Youtube video presentation :
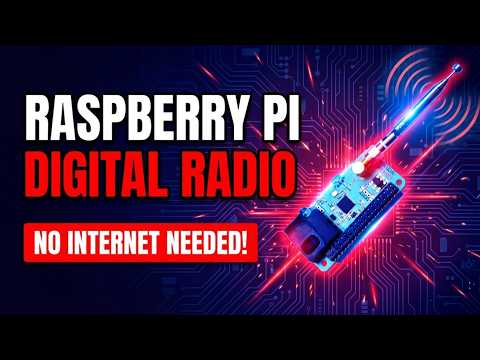

Add this shield to a Raspberry Pi Zero, 4 or 5 to install a fully local FM, DAB, AM and HD Radio (United States) receiver in minutes, listen without internet, record audio, and control everything from a polished web UI on your local network.
The Raspiaudio Digital Radio Shield for Raspberry Pi is a compact all-in-one radio board that brings AM, FM, DAB, DAB+, and HD Radio support to Raspberry Pi boards with a 40-pin header. It combines a local Web UI, CLI control, analog audio output, I2S digital audio, a built-in 1 x 5 W amplifier, a switchable onboard speaker output, and an onboard 3-way navigation control with up, down, and push actions for standalone menu-based projects.
HD Radio is subject to licensing. Please verify that you are legally allowed to use it in your country and for your intended application.


The focus is simple:
- no internet required to listen to radio
- resilient local control
- browser-based Web UI for daily use
- CLI access for automation, scripting, and custom applications
The whole project is open source:
- GitHub: RASPIAUDIOadmin/Digital-Radio-for-Raspberry-Pi
- Product: Raspiaudio Digital Radio Shield for Raspberry Pi
Because we understand that you might be busy with your job or family, here is how to have instant fun.
Clone the project:
git clone https://github.com/RASPIAUDIOadmin/Digital-Radio-for-Raspberry-Pi.git
cd Digital-Radio-for-Raspberry-Pi
Enable SPI on the Raspberry Pi. The SI4689 radio chip is controlled over SPI, so the server can start but radio communication will fail if SPI is disabled.
sudo raspi-configThen select:
Interface Options -> SPI -> Enable
Reboot and check that SPI devices exist:
sudo reboot
ls /dev/spidev*
You should see /dev/spidev0.0 and /dev/spidev0.1.
Start the local radio server:
python radio.py serve --port 8686Then open:
http://piradio.local:8686/
If you are already on the Raspberry Pi, this is enough to get the Web UI and the CLI backend running.
- DAB / DAB+
- FM
- HD Radio
- AM
- AM HD
- local Web UI to scan, browse, tune, change volume, manage favorites, and handle recordings
- CLI to control the backend from the terminal or integrate the radio into your own software
- direct HTTP stream URLs for VLC, a browser, Music Assistant, or any compatible network player
- analog audio output on the shield
- I2S audio path for digital capture and recording
- built-in
1 x 5 Wamplifier - switchable onboard speaker output
- onboard 3-way navigation button: up, down, and push
- audio jack output
- screwless passive speaker output for an external speaker
4 ohmrecommended8 ohmsupported
- SMA antenna connector for the included antenna or a different external antenna
- AM antenna balun for impedance matching
- AM loop antenna connection support
- amplifier enable on
GPIO17 - local recordings list in the browser
Unlike an internet radio product, this setup does not depend on network streaming to play stations.
That makes it useful when you want:
- a radio that still works without internet access
- direct access to terrestrial broadcast bands
- a local control API you can reuse in your own program
- a Raspberry Pi based platform that is easy to extend
The recommended workflow is the local Web UI.
It gives you:
- source mode selection
- station scan
- station selection
- favorites
- amplifier on / off
- volume control
- recording controls
- recordings browser
- a simple radio workflow directly from a browser on the local network
Start the server on the Raspberry Pi:
python radio.py serve --port 8686Then open:
http://piradio.local:8686/
If you want recording from the SI4689 I2S output, enable the Raspberry Pi capture overlay in /boot/firmware/config.txt:
dtparam=i2s=on
dtoverlay=adau7002-simple,card-name=si4689_i2s
Then reboot the Raspberry Pi.
After reboot, you should see the capture card with:
arecord -lExpected result:
card 2: si4689i2s [si4689_i2s], device 0: ...
The server now auto-detects this ALSA capture device for recordings, so the normal command stays:
python radio.py serve --port 8686The default backend uses the Raspberry Pi as the I2S clock master and the SI4689 as I2S slave, which matches the Skyworks SDK example and the adau7002-simple capture overlay.
By default, the backend also trims the first 3 seconds of each WAV recording to remove the unstable I2S startup noise.
If needed, you can still force a device manually:
python radio.py serve --port 8686 --record-device plughw:CARD=si4689i2s,DEV=0If your hardware is wired for the opposite clock direction, you can override it:
python radio.py serve --port 8686 --i2s-masterIf you want to keep the full raw capture without trimming the first seconds:
python radio.py serve --port 8686 --record-trim-seconds 0The server can expose the shield as a live radio source for Music Assistant, VLC, a browser, or any player that can open an HTTP MP3 stream.
Stream URLs require the SI4689 I2S audio capture device to be installed on the Raspberry Pi.
The server captures si4689_i2s through ALSA and uses ffmpeg to expose MP3 streams over HTTP.
Install the I2S overlay described in I2S recording on Raspberry Pi before using /audio/live.mp3, station stream URLs, or generated playlists.
The important endpoints are:
http://piradio.local:8686/audio/live.mp3
http://piradio.local:8686/audio/live.mp3?icy=1
http://piradio.local:8686/audio/stations/<station_id>.mp3
http://piradio.local:8686/stream.wav?station_id=<station_id>
http://piradio.local:8686/api/station-streams?mode=dab
http://piradio.local:8686/playlists/dab.m3u
http://piradio.local:8686/playlists/dab.m3u?format=wav
http://piradio.local:8686/playlists/favorites.m3u
http://piradio.local:8686/api/live-metadata
How it works:
/audio/live.mp3streams the currently tuned station/audio/live.mp3?icy=1streams the currently tuned station with forced ICY metadata for compatible players/audio/stations/<station_id>.mp3retunes the hardware to the requested station and streams it/stream.wav?station_id=<station_id>retunes the hardware to the requested station and streams direct WAV from the I2S capture device/api/station-streams?mode=dabreturns the available DAB stations with MP3 and WAV stream URLs/playlists/dab.m3uexports all DAB stations as an MP3 playlist with ICY metadata/playlists/dab.m3u?format=wavexports all DAB stations as a direct WAV playlist, recommended for Music Assistant when reliability matters more than ICY metadata/playlists/favorites.m3uexports only favorites/api/live-metadatareturns the current DAB now-playing text and artwork URL as JSON
You do not have to use the Raspiaudio Web UI if you prefer your usual player.
For a quick test, paste the live stream URL directly into a browser:
http://piradio.local:8686/audio/live.mp3
For a station browser, open the generated DAB playlist in VLC with Media -> Open Network Stream:
http://piradio.local:8686/playlists/dab.m3u
If your network does not resolve piradio.local, use the Raspberry Pi IP address instead, for example:
http://192.168.1.154:8686/playlists/dab.m3u
VLC will display the stations from the playlist. Selecting another item retunes the Raspberry Pi service to that station, so you can switch between DAB stations from VLC without opening the Web UI. Generated playlists use metadata-enabled station URLs automatically.

Important limitation:
- the shield is a single hardware tuner
- starting a different station retunes the hardware for everyone
The simplest approach is to add the generated WAV playlist to the Builtin provider in Music Assistant.
http://piradio.local:8686/playlists/dab.m3u?format=wav
The WAV playlist uses direct I2S capture and the server keeps only one active stream at a time, which avoids unstable concurrent probes from Music Assistant retuning the single SI4689 tuner while another capture process is still running.
If you prefer MP3 and ICY metadata, import the MP3 playlist instead:
http://piradio.local:8686/playlists/dab.m3u
You can also add a single station URL manually.
For example:
http://piradio.local:8686/audio/stations/dab%3A0000f21b%3A00000001%3A195936.mp3
Once imported, Music Assistant can redistribute that terrestrial radio source to all supported players on the network.
When a client requests ICY metadata, or when the URL includes ?icy=1, the live stream injects:
- station name in the ICY headers
- current DAB text as
StreamTitle - artist/title fields when they can be parsed from DAB DLS text
- current DAB artwork URL as
StreamUrlandStreamArtworkwhen the multiplex provides MOT artwork
This works especially well with Music Assistant because it reads ICY StreamTitle from radio streams and can surface the current song in the UI and on compatible players.
Note:
- a plain browser MP3 request usually does not request ICY metadata, so it may play audio without showing title or artwork
- the generated M3U playlists include
?icy=1station URLs for metadata-capable players - Music Assistant reliably consumes
StreamTitle - artwork is exposed as a URL, not embedded as binary image data inside the MP3 stream
- artwork handling depends on the downstream client and current Music Assistant support for the source type
Example:
StreamTitle='THE WEEKND - In Your Eyes';
StreamUrl='http://piradio.local:8686/api/dab/artwork?ts=...';
StreamArtwork='http://piradio.local:8686/api/dab/artwork?ts=...';
The CLI uses the same backend as the Web UI.
That means you can control the radio manually from the terminal, or use the commands as a base for your own scripts and applications.
Open a first terminal on the Raspberry Pi and start the local backend:
python radio.py serve --port 8686Then keep a second terminal open and send commands interactively, one by one:
python radio.py status
python radio.py stations --mode dab
python radio.py play 0
python radio.py volume 31
python radio.py volume +2
python radio.py amp on
python radio.py record start
python radio.py record stop
python radio.py recordings
Useful examples:
python radio.py boot --mode dab
python radio.py scan --mode fm
python radio.py stations --mode fm
python radio.py play AIRZEN RADIO
python radio.py play dab:0000f204:00000009:199360
python radio.py favorite 0
To see all available commands:
python radio.py --helpradio.pyentry point for the CLIraspiaudio_radio/shared backend, HTTP server, and Web UIfirmwares/firmware and patch files used by the radio backendlegacy/older low-level scripts kept for reference
The current radio backend is intentionally kept simple:
- SPI control
- local firmware host-load
- Web UI + CLI on the same backend
- station playback
- favorites
- local browser control
- I2S recording workflow
Boot from external flash is now validated on the Raspberry Pi with the SI4689.
In practice, flash boot is especially interesting when the host talks to the tuner over a slower control link such as I2C. With fast SPI host-load, the gain is smaller, because SPI host-load is already quite fast. With I2C, flash boot should save much more startup time.
Validated flash programming sequence:
- host-load
rom00_patch.016.bin - erase chip with
0x05 0xFF 0xDE 0xC0 - write flash using
FLASH_WRITE_BLOCK0x05 0xF0 0x0C 0xED ...
Validated flash boot sequence:
- host-load
rom00_patch_mini.003.bin - send
LOAD_INIT FLASH_LOADthe full patch from0x00004000- send
LOAD_INIT FLASH_LOADthe DAB firmware from0x00092000- send
BOOT
Program the external flash from the normal CLI:
python radio.py flash dabStart the web server by booting the firmware from flash:
python radio.py serve --port 8686 --boot-source flashYou can also ask the server to try flash first and fall back to normal SPI host-load if flash boot fails:
python radio.py serve --port 8686 --boot-source autoValidation method:
- tune to DAB multiplex
199360 kHz - wait for
acq=trueandvalid=true - confirm that the service list is readable after boot
Benchmark measured on the Raspberry Pi on DAB 199360 kHz, from reset to a valid DAB lock (acq=true, valid=true):
| Control speed | Host-load over SPI | Flash boot mini | Flash boot full |
|---|---|---|---|
30 MHz |
2.37 s |
1.14 s |
2.40 s |
1 MHz |
7.10 s |
1.07 s |
1.00 s |
500 kHz |
12.57 s |
1.16 s |
0.99 s |
So, with the default fast SPI setup, host-load is already usable. The flash path becomes much more compelling when the host side is intentionally slowed down for debug, or when using a slower control interface such as I2C.
Current shield-oriented defaults:
RSTB = BCM25AMP_EN = BCM17SPI bus/device = 0/0- local firmware files loaded from
firmwares/ - onboard navigation input with
up / down / push - onboard speaker output with dedicated on / off control
- SMA antenna connector
- AM impedance-matching balun
- passive speaker connector
On Raspberry Pi OS:
Raspberry Pi Zero / 3 / 4:
sudo apt install python3-spidev python3-rpi.gpio python3-smbus2 alsa-utils ffmpegRaspberry Pi 5:
sudo apt install python3-spidev python3-rpi-lgpio python3-smbus2 alsa-utils ffmpegpython3-rpi-lgpio provides the same RPi.GPIO Python import used by the code, but supports the newer Raspberry Pi 5 GPIO controller.
This repository is not only a radio player.
It is also a base to:
- build your own radio application
- integrate the SI4689 shield into a custom Raspberry Pi project
- create your own UI on top of the CLI or HTTP backend
- experiment with local digital radio features without depending on cloud services
- Power input:
5Von Raspberry Pi header pins2and4GNDon pins6, 9, 14, 20, 25, 30, 34, 39
- SPI radio interface:
MOSIonGPIO10/ pin19MISOonGPIO9/ pin21SPICLKonGPIO11/ pin23SSBSIonGPIO8/ pin24
- Radio control:
INTonGPIO23/ pin16SI4689 RSTonGPIO25/ pin22ENABLE_AMPLIonGPIO17/ pin11
- I2S digital audio:
I2S BCKonGPIO18/ pin12I2S LRCKonGPIO19/ pin35I2S DOUTonGPIO20/ pin38
- Navigation button:
Switch CWonGPIO5/ pin29Switch PUSHonGPIO6/ pin31Switch CCWonGPIO13/ pin33
- RF and audio connections on the shield:
SMAantenna connector- AM loop antenna input
- AM impedance-matching balun
- audio jack output
- onboard speaker output with on / off switch
- passive external speaker output via screwless connector